OpenClaw deployment
Copyright © Quectel Wireless Solutions Co., Ltd. 2026. All rights reserved.
OpenClaw is a lightweight, highly extensible, open-source AI agent orchestration platform designed for low-barrier agent application scenarios. You can quickly build dedicated AI agents without extensive development and deploy them to various hardware environments, including edge development boards, AI BOX devices, and cloud servers.
Key features:
Lightweight deployment: No complex environment dependencies are required. The deployment process is simple, resource usage is low, and the platform is suitable for resource-constrained hardware environments.
Highly extensible design: The platform supports plug-in extensions and can be quickly integrated with channels such as Feishu to meet functional requirements in different scenarios.
Broad scenario compatibility: The platform supports deployment on various hardware environments, including edge development boards, AI BOX devices, and cloud servers, to meet different deployment needs.
Easy to use: No specialized development skills are required. You can build and debug AI agents through wizard-based configuration and simple command-line operations.
Install OpenClaw
Update system dependencies and install the required tools
Run the following commands to update the system package sources and install basic tools such as curl and git, completing the environment preparation required for subsequent installation:
sudo apt update
sudo apt install -y curl git ca-certificates build-essential jq
Install Node.js 22
OpenClaw officially requires Node.js 22 or later in the runtime environment. Run the following commands to install Node.js 22:
curl -fsSL https://deb.nodesource.com/setup_22.x | sudo -E bash -
sudo apt install -y nodejs
After installation, verify whether the versions meet the requirements:
node -v   # the expected output is v22.x.x or later
npm -v    # the expected output is 10.x.x or later
Install OpenClaw
Use npm to install the latest version of OpenClaw globally, and verify that the installation was successful:
sudo npm install -g openclaw@latest
openclaw --version
Note: Tips |
|---|
The installation usually takes 5–10 minutes, depending on network speed. |
Initialize OpenClaw
After the initial installation, you must complete the configuration wizard; otherwise, OpenClaw cannot run properly. Run the following command to start the configuration wizard and install the gateway daemon:
openclaw onboard --install-daemon
The gateway daemon, implemented as a launchd or systemd user service depending on the operating system, keeps OpenClaw running continuously in the background.
Configuration wizard step screenshots (for reference):
On the installation confirmation screen, select Yes, and then press Enter.
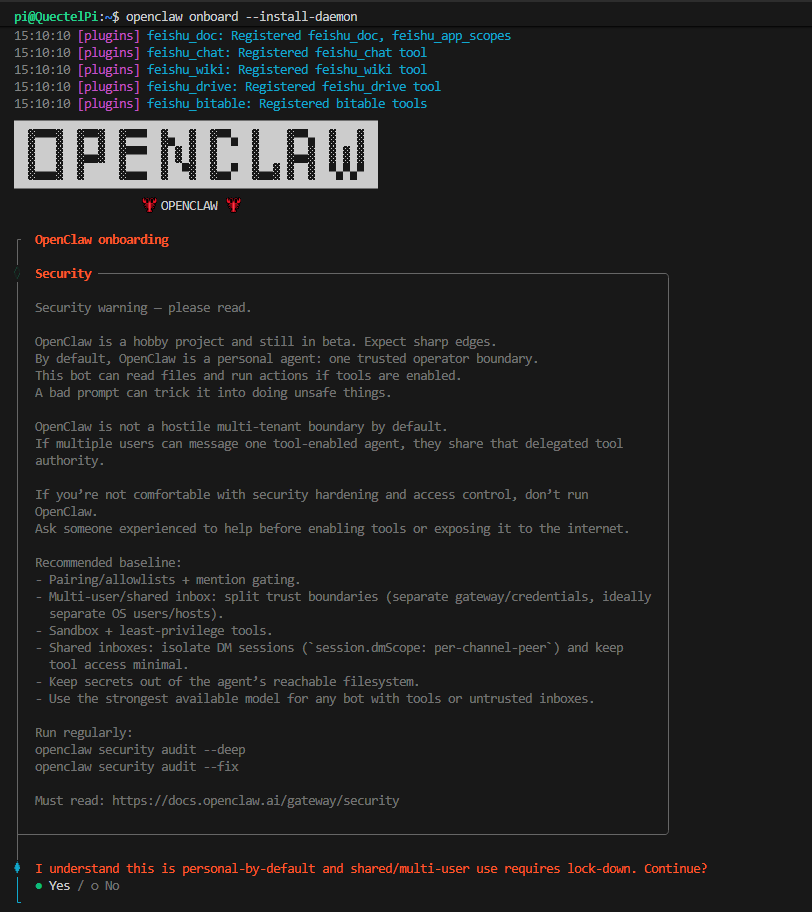
In the Onboarding mode option, select QuickStart;

In the Model/auth provider option, select Qwen, and then press Enter.
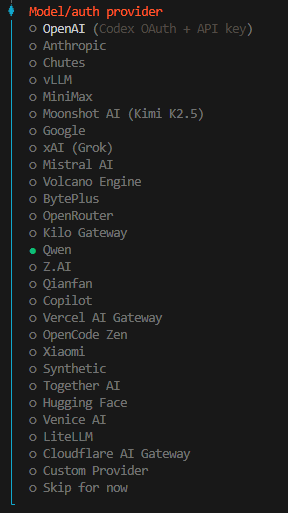
Open the specified website, sign in to the qwen-code platform, and complete authentication.
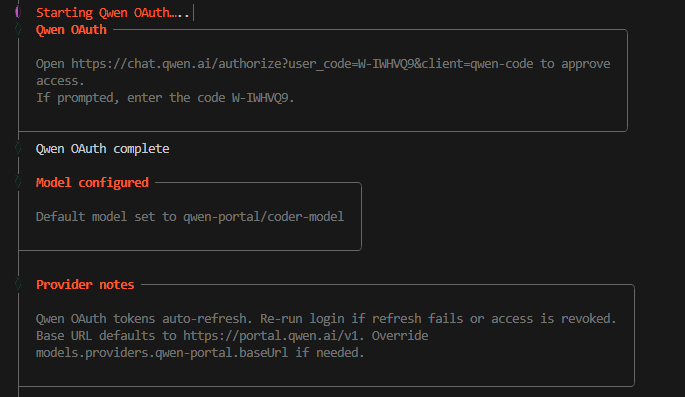
After completing the configuration, restart the gateway for the settings to take effect:
openclaw gateway restart
Integrate with Feishu
Install Feishu plug-in
Feishu plug-in repository: https://github.com/m1heng/clawdbot-feishu?tab=readme-ov-file#english
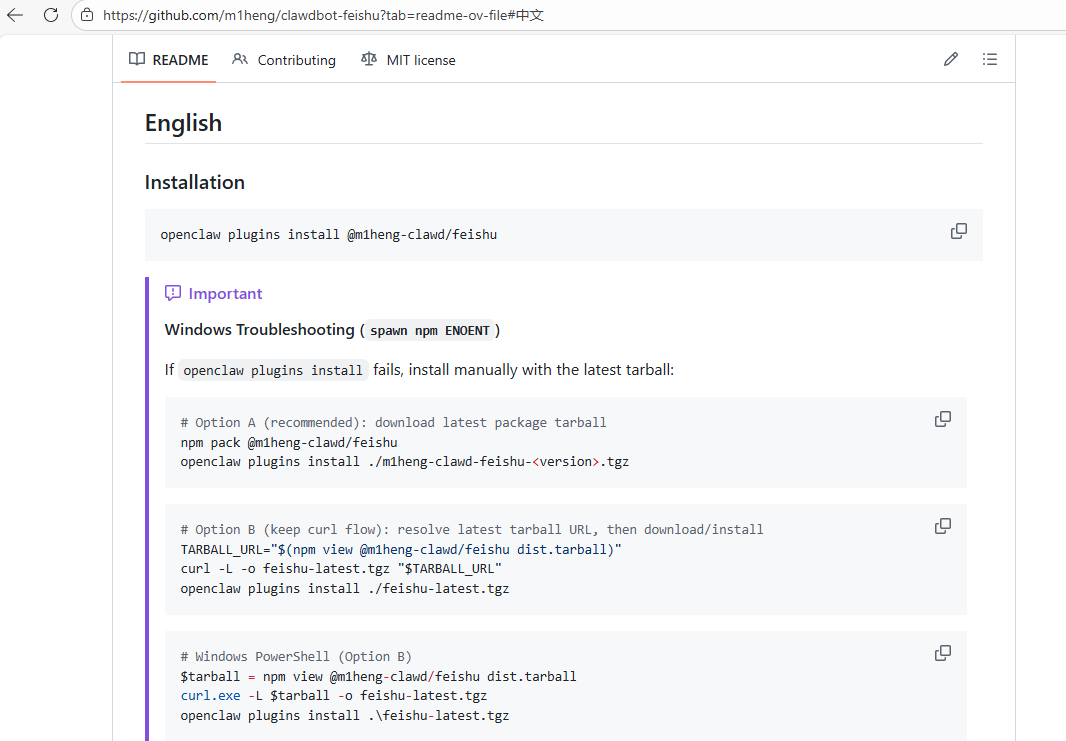
Run the following command to install the Feishu plug-in:
openclaw plugins install @m1heng-clawd/feishu
If the plug-in is already installed, run the following command to upgrade it to the latest version:
openclaw plugins update feishu
Create a Feishu app
Sign in to the Feishu Open Platform developer console:
Feishu (China): https://open.feishu.cn/app?lang=zh-CN
Lark (international): https://open.larksuite.com/app
select Enterprise Self-Built App and create an app.
Enter basic information such as the app name and description.
In the left navigation menu, open the App Capability page, click Add App Capability, and enable the Bot capability.
Open the Credentials and Basic Information page, copy and securely save the app’s App ID and App Secret, and use these credentials when configuring the plug-in.
Configure plug-in
Run the following commands in the terminal, replacing appId and appSecret with the actual values obtained in the preceding steps to complete the basic Feishu plug-in configuration:
openclaw config set channels.feishu.enabled true --json
openclaw config set channels.feishu.appId "cli_xxxxx"
openclaw config set channels.feishu.appSecret "your_app_secret"
Configure permissions
In the Feishu Open Platform app console, open the Permission Management page and configure the following permissions for the app, including required and optional permissions:
Required permissions
Permission |
Scope |
Description |
|---|---|---|
im:message |
Messages |
Send and receive messages. |
im:message.p2p_msg:readonly |
Direct messages |
Read direct messages sent to the bot. |
im:message.group_at_msg:readonly |
Group messages |
Receive messages that @mention the bot in groups. |
im:message:send_as_bot |
Message sending |
Send messages as the bot. |
im:resource |
Media resources |
Upload and download images or files. |
Optional permissions
Permission |
Scope |
Description |
|---|---|---|
contact:user.base:readonly |
User information |
Obtain basic user information to resolve sender names and prevent different users in group or direct chats from being identified as the same speaker. |
im:message.group_msg |
Group messages |
Read all group messages. This is sensitive permission; configure it when requireMention:false must apply to group messages that do not @mention the bot. |
im:message:readonly |
Message history |
Retrieve message history. |
im:message:update |
Message editing |
Update or edit sent messages. |
im:message:recall |
Message recall |
Recall sent messages. |
im:message.reactions:read |
Emoji reactions |
View emoji reactions to messages. |
Configure events and callbacks
In the Feishu Open Platform app console, open the Event and Callback page and complete the following configuration:
Event configuration method
Receive events over a persistent connection: Set connectionMode: “websocket”. This method is recommended and does not require a publicly accessible URL.
Receive events using a request URL: Set connectionMode: “webhook”. This method requires a publicly accessible URL.Click Add Event Subscription and subscribe to the following events as needed:
Event |
Description |
|---|---|
im.message.receive_v1 |
Receive messages (required event). |
im.message.message_read_v1 |
Message read receipts. |
im.chat.member.bot.added_v1 |
Bot joins a group chat. |
im.chat.member.bot.deleted_v1 |
Bot is removed from a group chat. |
Release and test
In the Feishu Open Platform app console, open the Version Management and Release page.
Create a new version and submit it for release review.
After the release is approved, the app can be found in the Feishu client for basic testing.
User permission approval and exception handling
When a Feishu user chats with the bot for the first time, the system initiates permission verification, and the corresponding Pairing code is displayed in the chat interface. Run the following command in the terminal of the device where OpenClaw is deployed to approve the user’s permissions. After approval, the user can chat with the bot:
openclaw pairing approve feishu "Pairing code shown in the prompt"
OpenClaw feature demonstration
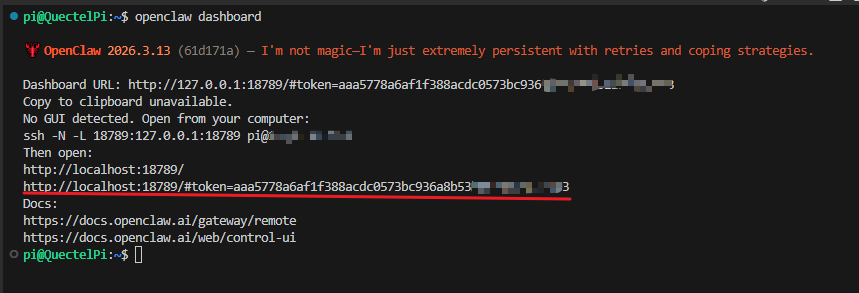
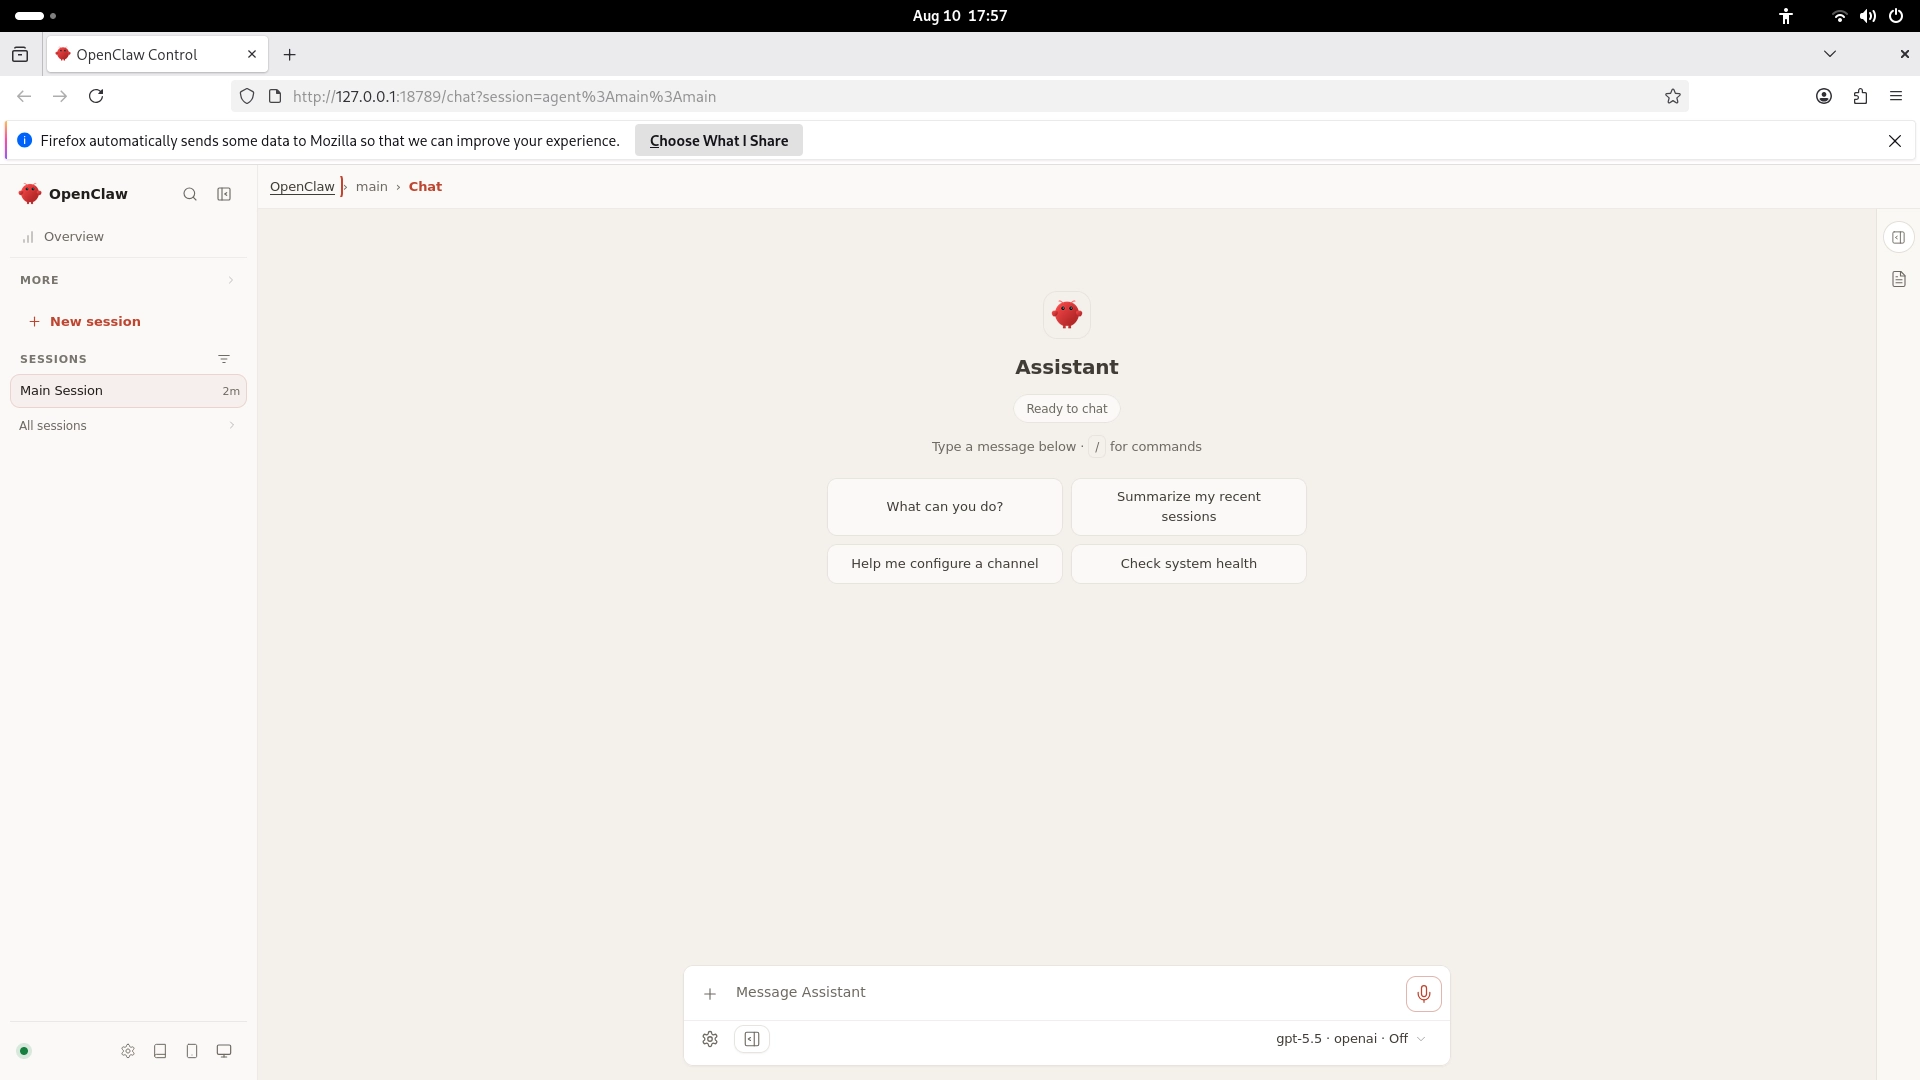
Run openclaw dashboard in the terminal to view the access address of OpenClaw’s web management page.
Deploy an open-source project
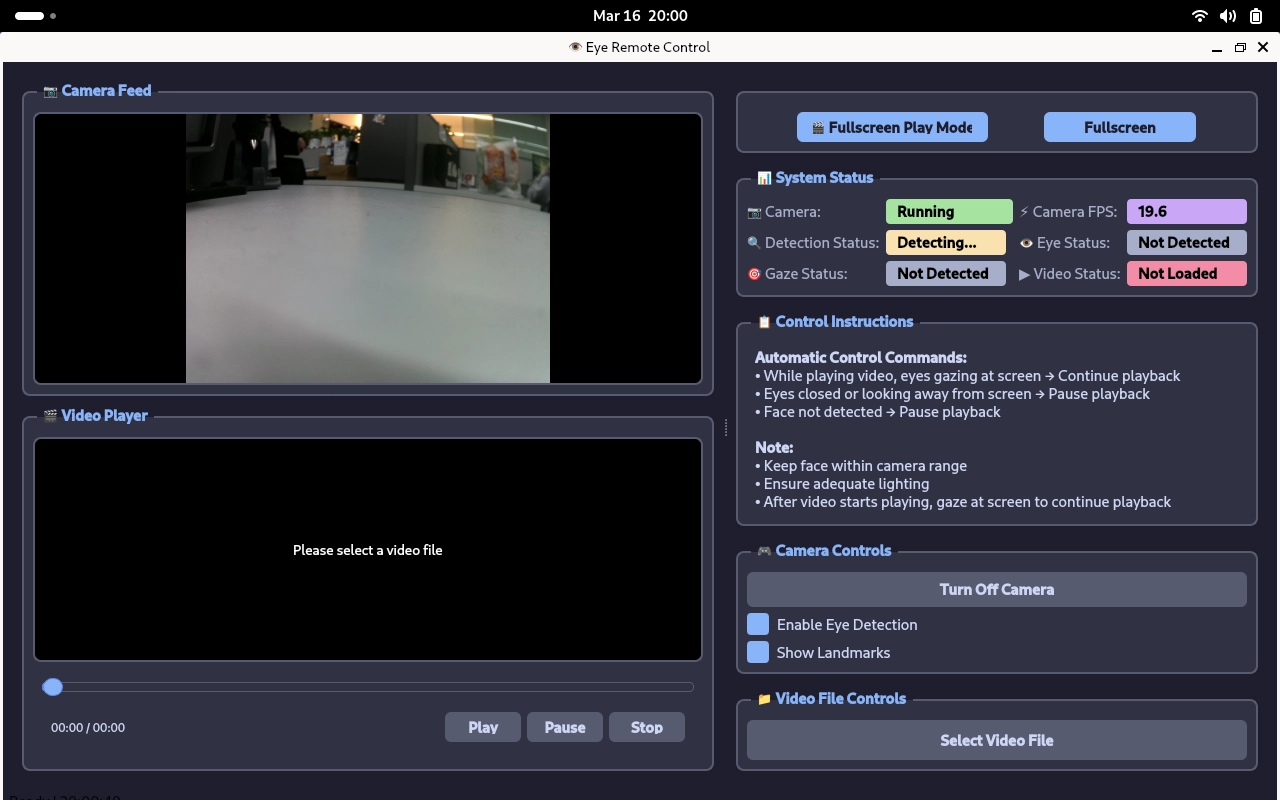
After completing the OpenClaw deployment, refer to the official Open-source projects to configure the corresponding demo environment.
Run the demo program to verify that its basic functions configured with OpenClaw work properly.
Result screenshots:
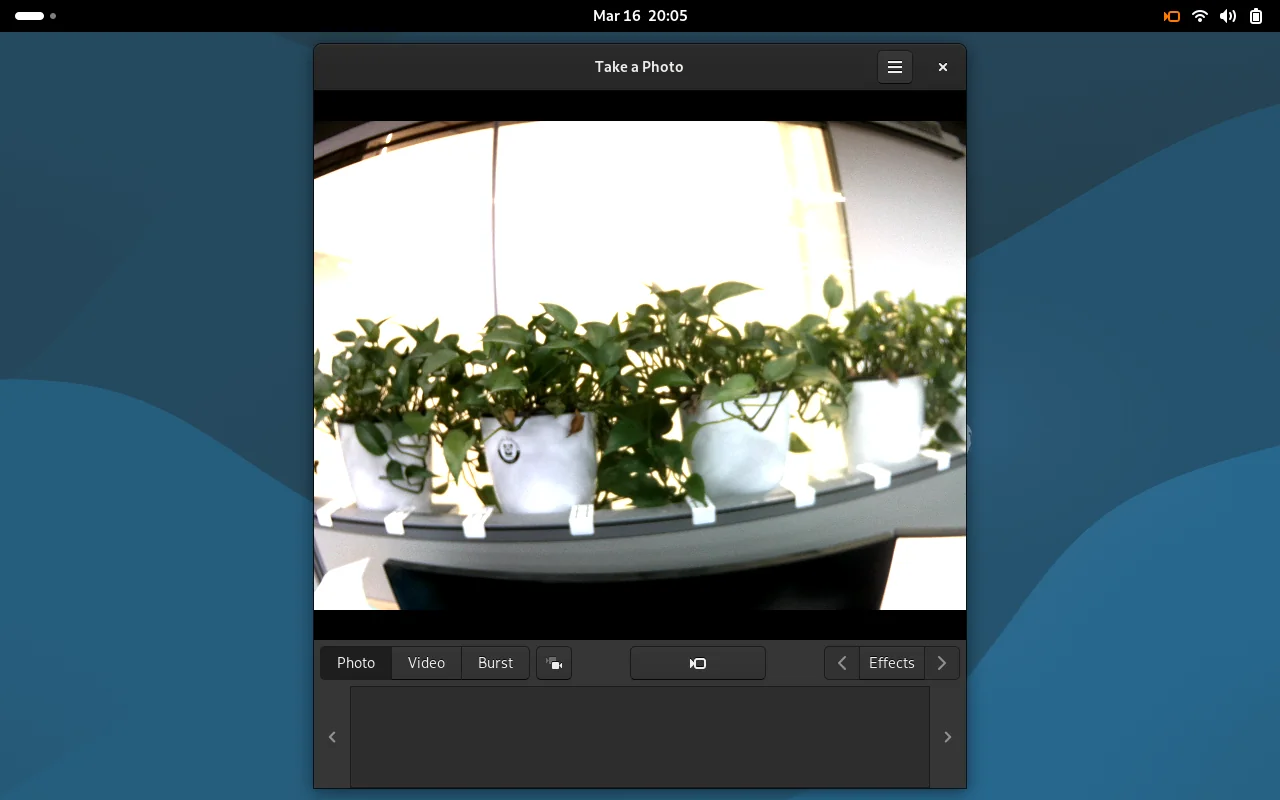
Control peripherals
Send a control command through the OpenClaw web control page. After the command is executed, view the USB camera’s live preview on the connected display.